Where can I find the images that have been attached to the tasks, and how can I handle them as the administrator/supervisor?
As the administrator, you can see all tasks with attached images for all customers.
As the supervisor, you can see tasks with attached images for customers in the customer areas you have been assigned to. For more information regarding this, go to Company Structure.
In this article, you will learn where to find and how to handle attached images:
This is how you find a task with attached images
 |
In the menu, go to Check-in > Photo documentation |
| |
|
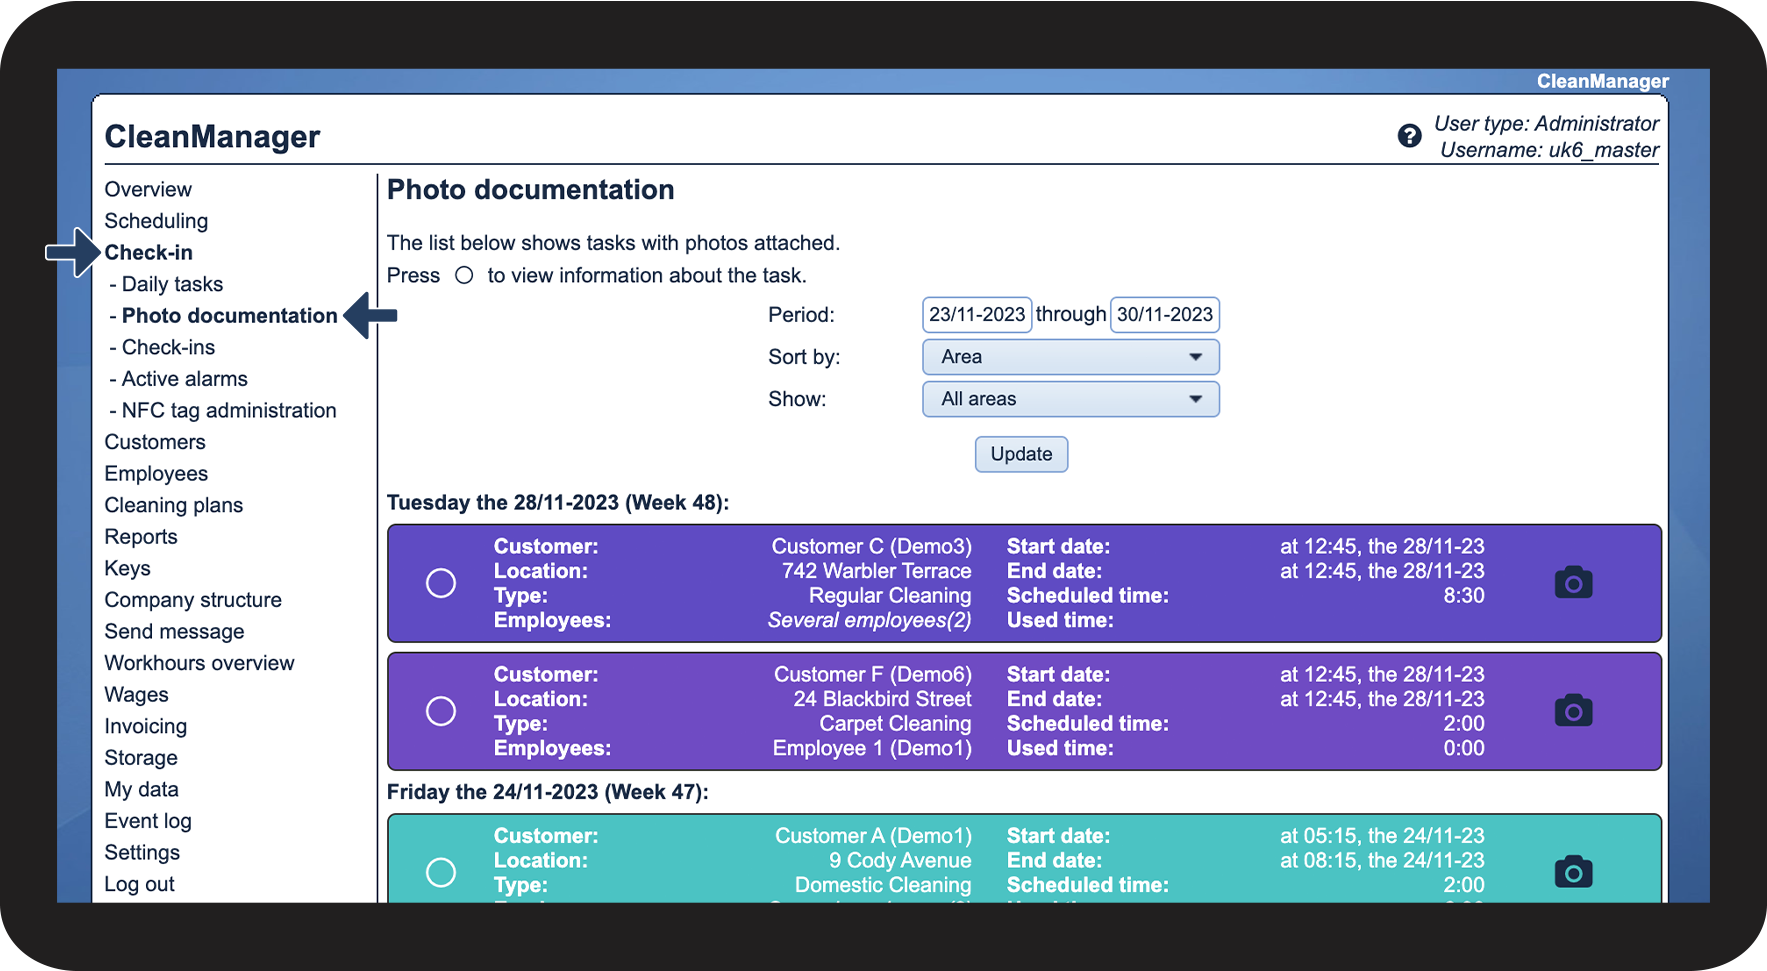 |
 |
Click on a task to display the attached images |
|
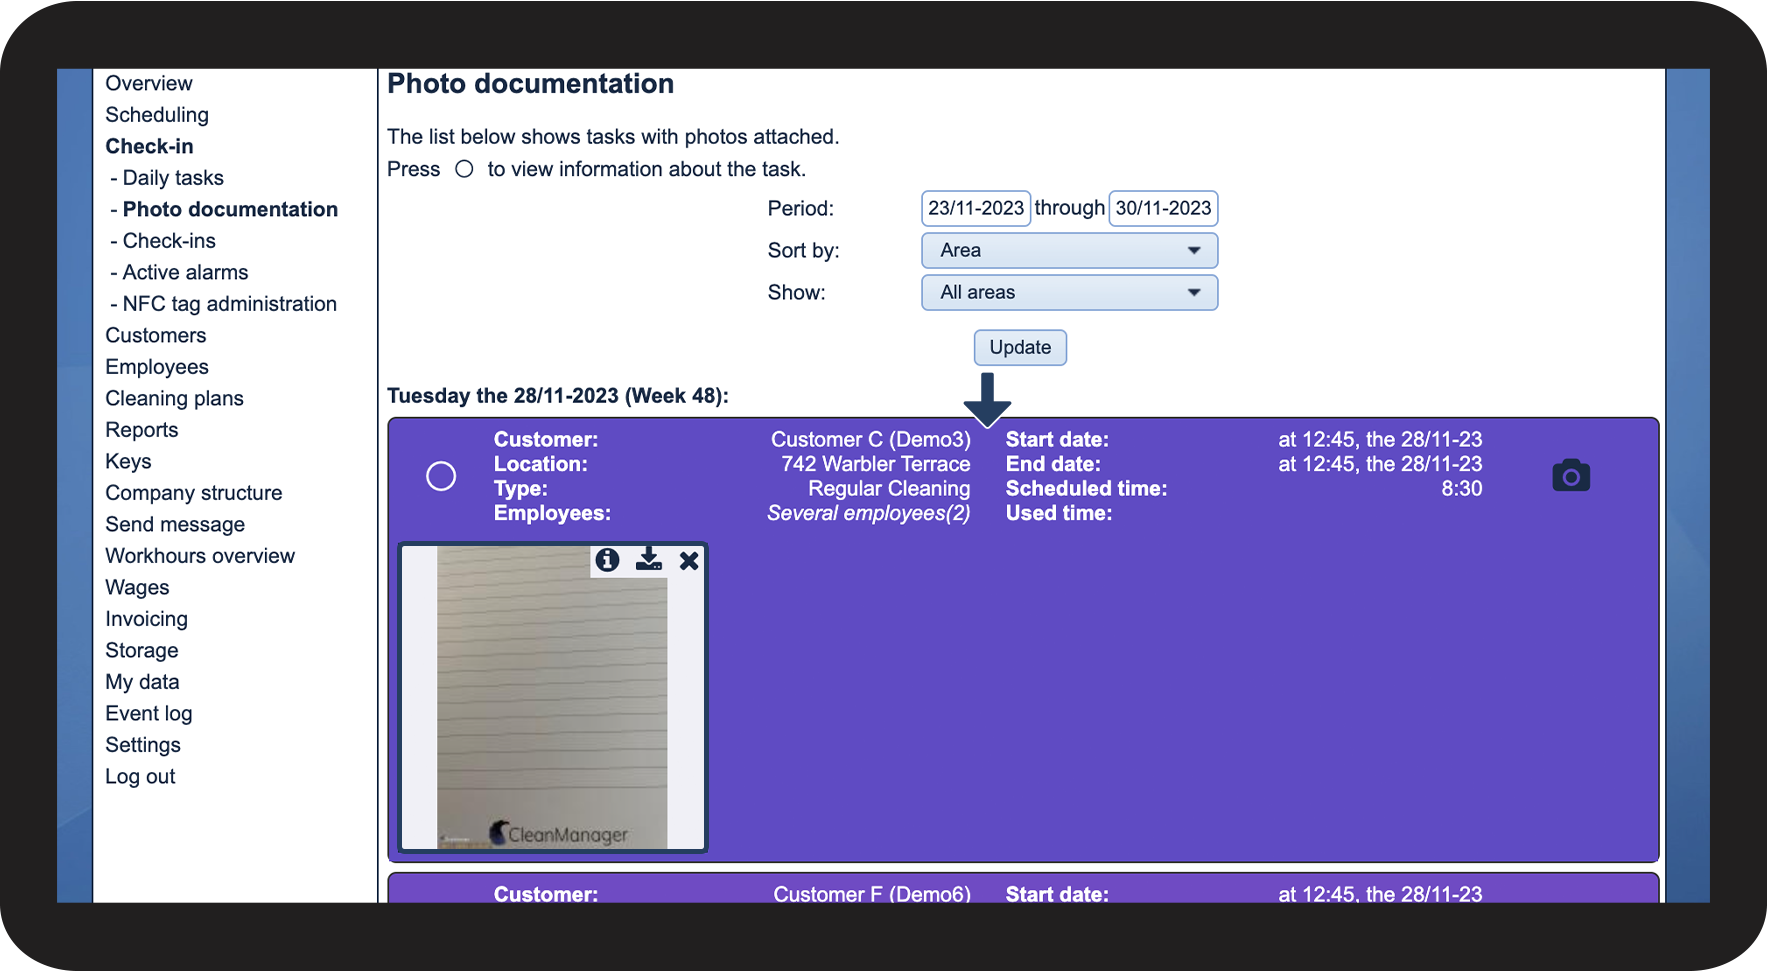
|
| |
|
INFO:
If the phone is connected to the internet, the images will be synchronized immediately when you attach them. This means, that the administrator or supervisor is able to see the pictures in the websystem before the task has been ended.
However, if the phone does not have service, the images will not be synchronized until an internet connection has been re-established.
For more information about this, go to Image documentation and comments on a task and Handling of "no connection to the server".
|
|
This is how you can zoom in on an image
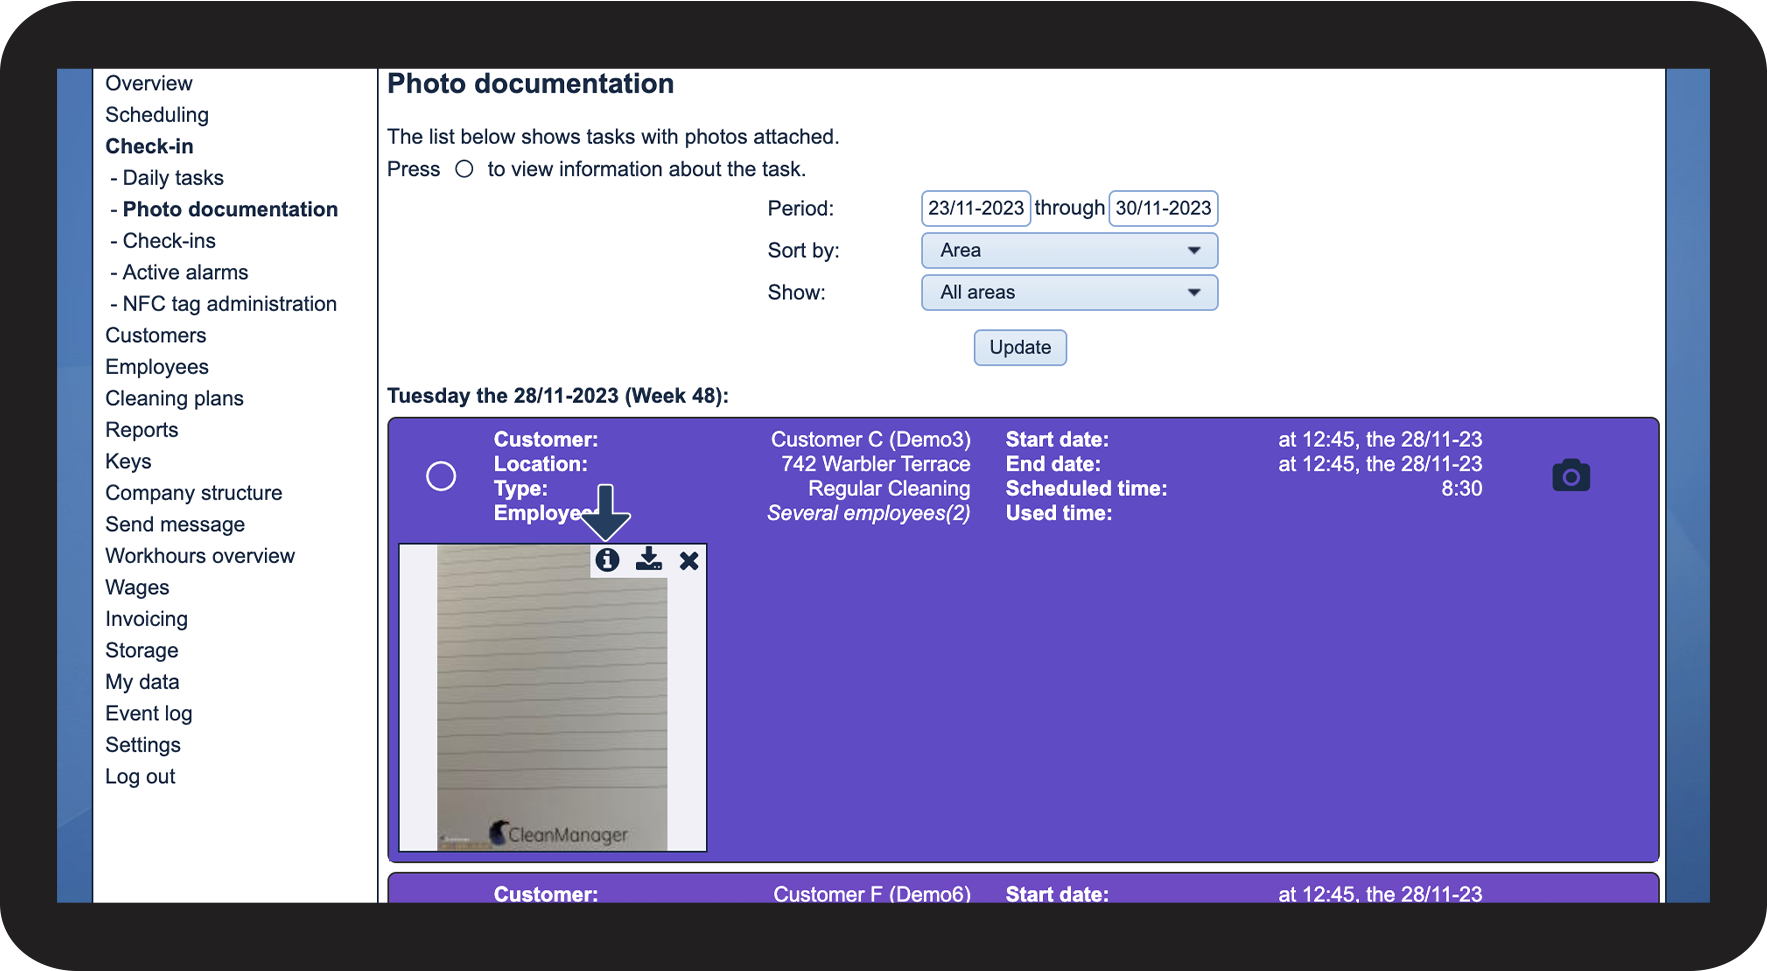
This is how you can see if a comment has been added to the image
|
If your staff has added a comment to an image, an information icon  will appear. Click on the icon to see the comment will appear. Click on the icon to see the comment |
|
|
|
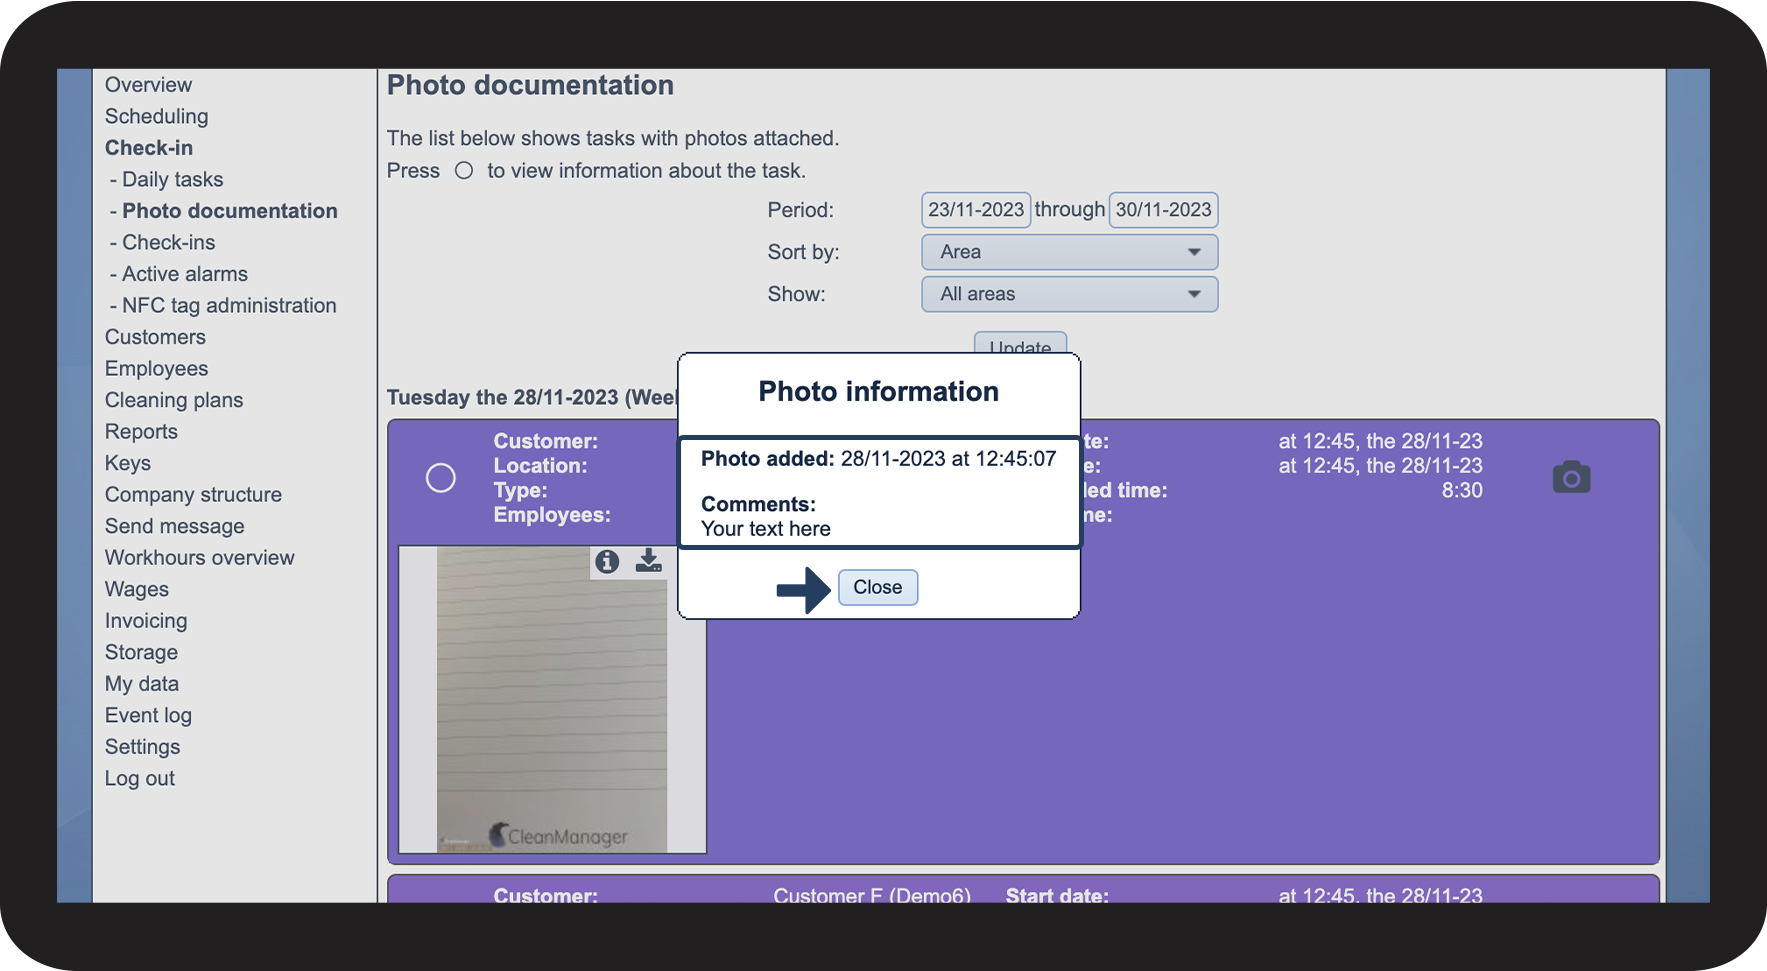
In this view, you will be able to see when the photo was added and what comment has been written
|
| |
Click on Close to go back
|
|
|
This is how you can download the image
|
Click on  to download the photo to your computer to download the photo to your computer |
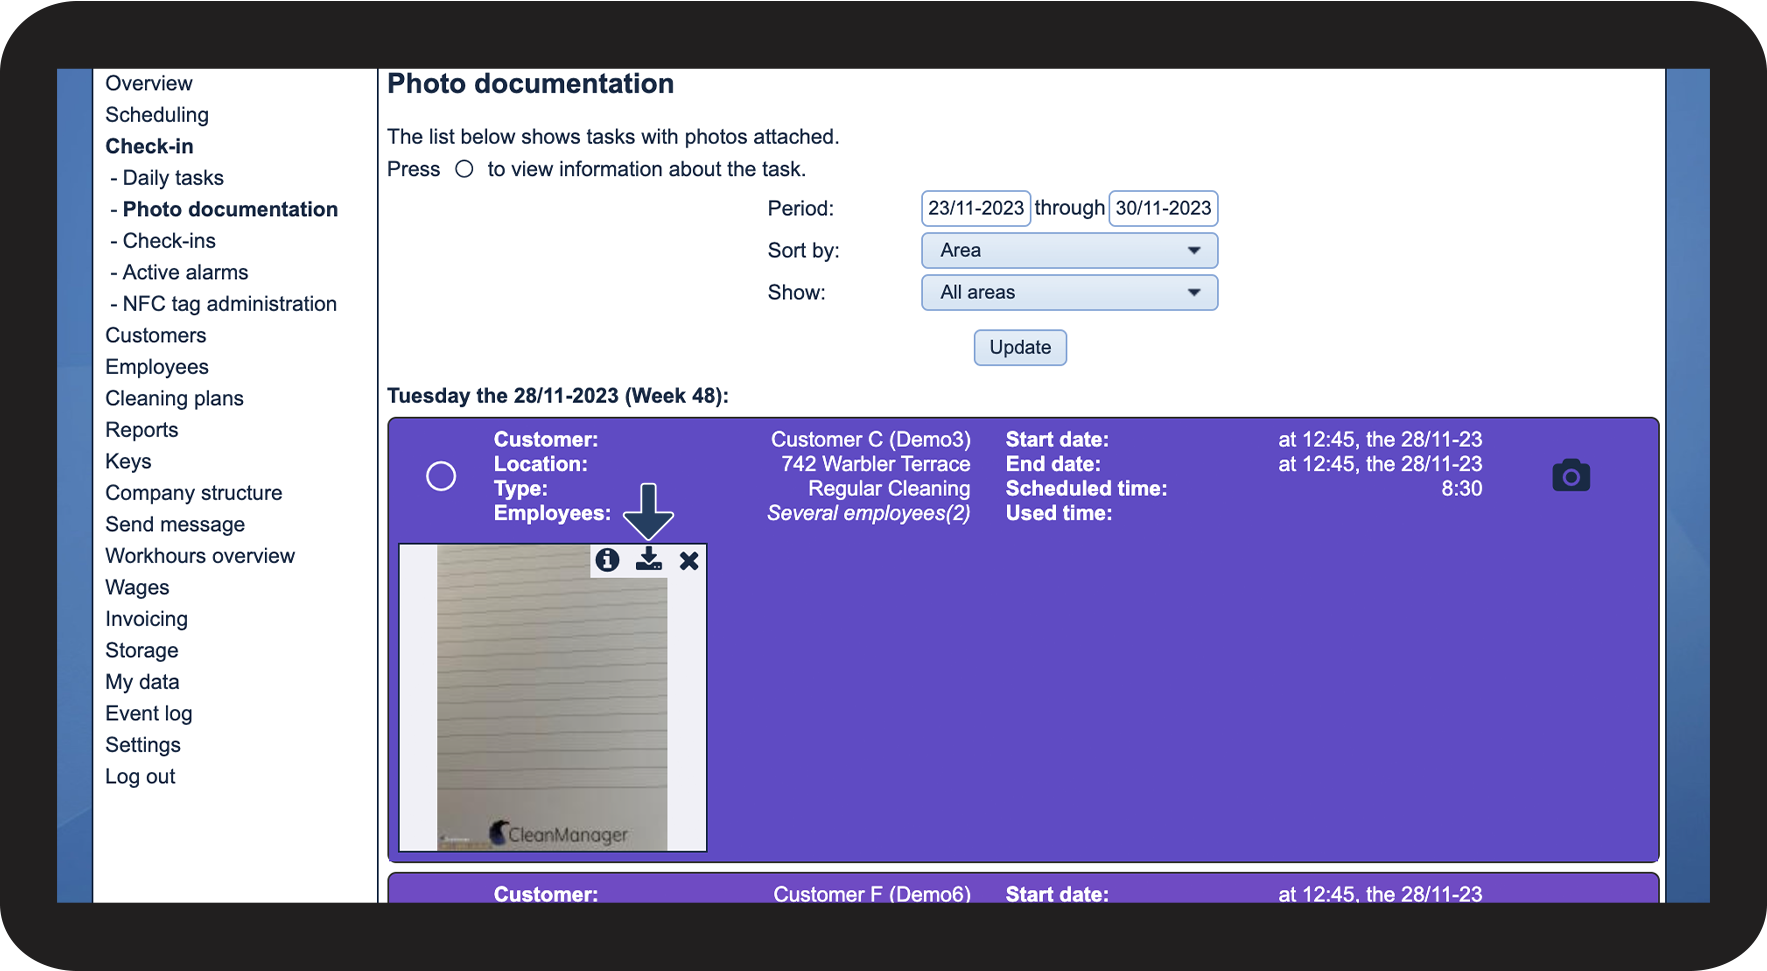
|
This is how you can delete an image
This is how you can handle the tasks
|
Click on  to view the task information to view the task information |
| |
Depending on the status of the task, you will have different options for handling the tasks available:
- Approve hours
- Reject hours
- Clear check-in time
- Billeddokumentation
- Edit
- Copy
- Delete
- Show in calendar
|
| |
|
NOTE:
Clear check-in time is only available if the task has not yet been ended in the app.
Approve hours and Reject hours are available if the hours submitted from the app have not yet been acted upon.
|
|
|

|
|
See the table below for an explanation of the different options |
| |
| Edit |
This option allows you to edit the task. If the task is part of a repetition, you will be asked how many of the tasks you wish to edit. |
| Copy |
This option allows you to copy an existing task. When you make the copy, you can also edit the task. |
| Delete |
This option allows you to delete a task. If the task is part of a repetition, you will be asked how many you wish to delete. The task will be permanently deleted from the system. |
|
Show in calendar
|
This option leads you to where you can find the task in the calendar. |
| Clear check-in time |
The check-in time will be removed from the task. However, if the employee ends the task, the time will be registered again. If you wish to clear the check-in time completely, you can ask the employee to delete the task in their app. Read more about that here: Deleting a task. |
| Photo documentation |
By clicking on this option, you can see all attached images. This option is only available if images have been attached to the task. |
| Approve hours |
This option allows you to approve the hours that the employee has registered via the app. |
| Reject hours |
This option allows you to reject the hours that the employee has registered via the app. |
|

Comments
0 comments
Please sign in to leave a comment.